Hey there! So, you’re looking to descale your single-serve coffee maker, huh? Well, no worries, I’ve got your back! In this step-by-step guide, we’re going to walk you through the process of descaling your coffee maker to keep it running smoothly and brewing that delicious cup of joe you love.
Descaling is important because minerals from your water can build up over time, causing your coffee maker to perform poorly and affecting the taste of your coffee. But don’t worry, it’s a pretty straightforward process, and we’ll break it down for you in easy-to-follow steps.
By the end of this guide, you’ll be a descaling pro, and your single-serve coffee maker will be back to making that perfect cup of coffee to kick-start your day. So, let’s dive right in and get your coffee maker back in tip-top shape!
Top Picks for Coffee Lovers


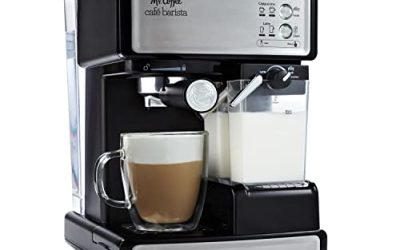
How to Descale Your Keurig K Slim Coffee Maker
Prepare the coffee maker
To prepare the coffee maker, start by unplugging it from the power source. This step is important to ensure your safety and avoid any electrical accidents. Once you have done that, remove any remaining coffee pods from the machine. This can be done by opening the pod compartment and taking out the used pods. This will prevent any clogs or residue from affecting the taste of your next brew.
Next, empty the water reservoir. This is where the water for brewing the coffee is stored. To do this, simply pour out any remaining water or coffee grounds from the reservoir into the sink. It’s important to discard both the water and the grounds to prevent any stale flavors in your next cup. You can use a paper towel or a clean cloth to wipe the reservoir clean if needed.
Lastly, before you proceed, make sure the coffee maker is cool. This is to prevent any burns or accidents while handling the machine. You can touch the exterior of the coffee maker to check if it has cooled down completely. It’s always better to be safe than sorry!
To summarize:
- Unplug the coffee maker.
- Remove any remaining coffee pods.
- Empty the water reservoir and discard any water or coffee grounds.
- Make sure the machine is cool before proceeding.
Following these simple steps will ensure that your coffee maker is ready for the next brewing session and will help you achieve the best-tasting cup of coffee every time!


Prepare the descaling solution
To prepare the descaling solution, start by referring to your user manual or the manufacturer’s instructions to determine the appropriate descaling solution for your specific appliance. For example, if you’re descaling a coffee machine, the manual might recommend using a citric acid-based solution or a specific brand of descaling product. Once you have identified the recommended solution, you can move on to the next step.
Next, it’s time to mix the descaling solution with water. Follow the instructions provided, which usually suggest a 1:1 ratio of solution to water. This means that for every unit of descaling solution, you’ll need an equal amount of water. For instance, if the manual instructs you to use 100ml of descaling solution, you should mix it with 100ml of water. Make sure to measure accurately to ensure the right concentration. Once you’ve mixed the solution and water together, it will be ready to use for descaling your appliance.
Remember, the specific instructions for preparing the descaling solution may vary depending on the appliance and the manufacturer’s recommendations. Always refer to the user manual or the manufacturer’s instructions for the most accurate information.
Run a descaling cycle
To run a descaling cycle, start by pouring the descaling solution into the water reservoir of your coffee maker. Make sure to follow the recommended amount of solution as stated in the instructions. Next, place a container, such as a mug or carafe, under the coffee maker’s spout to collect the solution that will be flushed out during the descaling process.
Now, it’s time to initiate the descaling cycle. Refer to your machine’s instructions to understand the specific steps for your model. Typically, this will involve pressing a combination of buttons or selecting a specific menu option. Once you’ve followed the instructions, the machine will begin pumping the descaling solution through its internal system.
It’s important to allow the descaling solution to run completely through the machine. This will ensure that any mineral buildup or residue is effectively removed. Depending on your coffee maker, this process may take a few minutes. Once the solution has completely passed through the machine, you can discard it. Remember to always follow proper disposal guidelines for descaling solutions in your area.
By carefully following these steps, you’ll be able to run a descaling cycle to maintain the performance and longevity of your coffee maker.
Rinse the coffee maker
After the descaling cycle is complete, empty the container with the used descaling solution. Make sure the coffee maker is turned off and cool before doing this. Carefully remove the container and pour out the solution. Be cautious as the solution may still be hot. Once the container is empty, rinse it with warm water to remove any residue.
Next, fill the water reservoir with clean water. Use cold water for this step. Make sure not to overfill the reservoir, as it may cause spills or leaks. Once the reservoir is filled, place it back in its original position in the coffee maker.
Now, it’s time to run a rinse cycle to flush out any remaining descaling solution from the machine. Turn on the coffee maker and select the rinse cycle option, if available. If there is no specific rinse cycle option, you can run a regular brewing cycle without adding any coffee grounds. Allow the machine to complete the rinse cycle, ensuring that clean water runs through the entire system.
Lastly, check if any traces of the descaling solution are still present. If there is any residue or odor, repeat the rinse cycle. This will help ensure that all the descaling solution is thoroughly flushed out of the coffee maker. Once you’re satisfied that the machine is clean, you can proceed to use it as usual.
Remember to always follow the manufacturer’s instructions for your specific coffee maker model when performing any maintenance tasks.
Clean and reassemble
To start cleaning your coffee maker, grab a damp cloth and give the exterior a good wipe-down. This will help remove any dust or stains that may have accumulated. Next, you’ll want to focus on the removable parts, such as the water reservoir and drip tray. Take these pieces and wash them using warm soapy water. Make sure to give them a thorough scrub to remove any build-up or residue. Once they’re squeaky clean, rinse them off and dry them completely before moving on to the next step.
Now that the parts are clean and dry, it’s time to reassemble your coffee maker. Put the water reservoir and drip tray back in their respective places, making sure they fit snugly. Once everything is back in its proper place, plug in the machine and get ready to brew. But hold on! Before you make your first cup of coffee, it’s important to run a brewing cycle with clean water. This will ensure that any remaining soap or debris is flushed out, leaving your coffee maker ready for use. So go ahead, add water to the reservoir, press that brew button, and enjoy a freshly cleaned coffee maker!
The Final Steps
In conclusion, descaling your single-serve coffee maker is essential for keeping it running smoothly and ensuring its longevity. By following the steps outlined in this guide, you can effectively remove mineral buildup and maintain the performance of your machine. Remember to regularly descale your coffee maker to prevent clogs and potential damage. Taking care of your coffee maker will result in a better-tasting cup of coffee every time. Cheers to coffee that’s always on point!
Get what you need


Quick and Easy Fixes
Brewing the Perfect Cup in a Snap
- Choose your favorite coffee: Pick the coffee flavor or brand you prefer and make sure it is compatible with your single-serve coffee maker. Most machines work with specific coffee pods or capsules, so check the packaging to ensure a proper fit
- Prepare the machine: Fill the water reservoir with fresh, clean water according to the manufacturer’s instructions. Some machines have a removable reservoir, while others require you to pour water directly into the machine. Make sure the machine is plugged in and turned on
- Insert the coffee pod or capsule: Open the machine’s pod/capsule compartment and place your chosen coffee pod inside. Follow the specific instructions for your machine to ensure proper placement and alignment
- Select your brew size: Most single-serve coffee makers offer multiple brew size options, such as small cup, medium cup, or large cup. Select the size that suits your preference or the amount of coffee you need
- Brew your coffee: Once you have inserted the coffee pod and selected your brew size, press the appropriate button to start the brewing process. The machine will usually take a few moments to heat up the water and then start brewing your coffee. Wait until the brewing is complete
- Enjoy your coffee: Once your coffee is brewed, carefully remove the used coffee pod or capsule and discard it. Pour the freshly brewed coffee into your favorite mug and add any desired milk, sugar, or other flavorings. Sit back, relax, and enjoy your delicious cup of coffee!
- Remember, it’s always a good idea to consult the instruction manual that comes with your specific single-serve coffee maker to ensure you are following the manufacturer’s guidelines. Happy brewing!


0 Comments