To clean a single serve pod machine, start by removing any remaining pods and disposing of them properly. Then, take apart the machine according to the manufacturer’s instructions and remove any detachable parts, such as the drip tray and water reservoir.
Next, wash these parts with warm, soapy water and rinse them thoroughly. Use a soft brush or cloth to remove any debris or residue.
To clean the machine itself, fill the water reservoir with a mixture of equal parts water and white vinegar. Run a cleaning cycle or brew several empty cups until the reservoir is empty. This will help to descale and remove any buildup inside the machine.
After the vinegar cycle, run a few more cycles with clean water to rinse out any remaining vinegar.
Once you’ve cleaned the machine and its parts, dry them thoroughly before reassembling everything. It’s important to let the machine air dry completely to prevent any mold or mildew growth.
Finally, wipe down the exterior of the machine with a damp cloth to remove any spills or stains.
By following these steps regularly, you can keep your single serve pod machine clean and ensure that it continues to produce delicious beverages.
The Perfect Cup, Every Time


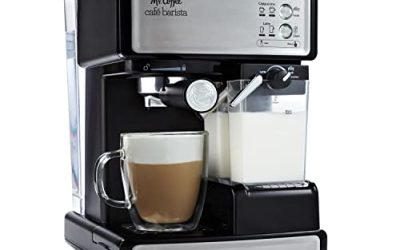
Step-by-Step Guide: Cleaning Your Keurig® K-Mini Coffee Maker
Gather the necessary supplies
Before you start cleaning, gather the supplies you’ll need. Begin by finding a clean cloth to use for wiping surfaces. Look for a soft cloth that won’t scratch or damage the item you’re cleaning. Next, locate some dish soap and mix it with water in a small container or bowl. This soapy solution will help remove any dirt or grime.
In addition to the cloth and soapy water, find a soft brush or toothbrush that you can use for scrubbing stubborn stains or reaching tight corners. This will allow you to apply a bit more pressure when cleaning without causing any harm. Lastly, grab a towel to dry off the item once you’ve finished cleaning. Make sure it’s clean and absorbent, so it doesn’t leave behind any streaks or moisture.
By gathering these necessary supplies beforehand, you’ll have everything at your fingertips when you start cleaning. This way, you won’t have to interrupt your cleaning process to search for missing items, making the task more efficient and hassle-free.


Unplug and disassemble the machine
To unplug and disassemble the machine, start by making sure it is completely unplugged and has cooled down. Safety first! Once that’s done, carefully disassemble the different components of the machine. For example, to remove the pod holder, gently push the release button located on the side and lift it out. To detach the drip tray, slide it forward and then lift it up and out. And don’t forget to remove the water reservoir, usually located at the back of the machine. Simply lift it up and away from the machine.
Remember to consult your user manual for specific instructions on how to disassemble your particular machine. The manual will provide detailed steps and may also have illustrations to guide you through the process. Take your time, be patient, and follow the instructions closely to avoid any damages or complications.
Once you have successfully unplugged and disassembled your machine, you can proceed with any necessary cleaning or maintenance tasks. Just remember to refer back to the user manual for guidance on reassembling the machine later.
Clean the removable parts
To clean the removable parts of your machine, start by creating a mixture of warm water and dish soap. In a bowl or basin, combine the two ingredients, ensuring that the soap is well-dissolved.
Next, take a soft brush or toothbrush and dip it into the soapy water. Use the brush to scrub away any residue or stains on the removable parts. Pay close attention to the nooks and crannies where dirt may accumulate. Make sure to scrub gently but thoroughly, removing any stubborn dirt or grime.
Once you have scrubbed all the parts, rinse them thoroughly with clean water. Ensure that all the soap is completely washed away, as any residue left behind may affect the functioning of your machine.
After rinsing, use a towel to dry the parts. Pat them gently to remove any excess water and ensure they are completely dry before reassembling.
Remember, cleaning the removable parts regularly will help maintain the performance and longevity of your machine. So, make it a habit to clean them using these simple steps.
Clean the internal components
To clean the internal components, start by filling the water reservoir with a mixture of equal parts water and vinegar. Make sure you have enough of the mixture to run a full cleaning cycle or brew a vinegar-water solution through the machine.
Next, consult the manufacturer’s instructions to determine the specific steps for running a cleaning cycle or brewing the solution. Follow these instructions carefully, as they may vary depending on the make and model of your machine.
For example, if your machine has a cleaning cycle option, simply select that setting and let the machine do its work. If there is no specific cleaning cycle, you can brew the vinegar-water solution by running the machine as if you were making a regular cup of coffee.
Remember to use the mixture you prepared earlier, and let the machine run until the entire reservoir is empty. This will ensure that the vinegar-water solution thoroughly cleans the internal components of the machine, removing any mineral deposits or build-up.
Once the cleaning cycle or brewing is complete, discard any remaining mixture and rinse the water reservoir thoroughly with clean water. This will ensure that no vinegar residue is left behind.
By following these easy-to-follow instructions and using a vinegar-water solution, you can effectively clean the internal components of your coffee machine and maintain its optimal performance.
Wipe down the exterior
To wipe down the exterior of the machine, start by grabbing a clean cloth. Dampen the cloth with water and add a small amount of mild soap. Make sure the cloth is not dripping wet, just slightly dampened. Now, using the cloth, begin wiping down the entire exterior of the machine. Don’t forget to pay special attention to the buttons, knobs, and the display screen. These areas tend to accumulate more dirt and fingerprints.
Move the cloth in gentle circular motions to effectively remove any dirt or stains. Once you’ve wiped down the entire exterior, grab a towel and dry it off thoroughly. This will ensure that no moisture remains on the machine, preventing any potential damage. And there you have it, a clean and spotless exterior for your machine!
Reassemble and run a rinse cycle
To reassemble and run a rinse cycle on your machine, follow these steps:
- Make sure all the parts are clean and dry: After cleaning each component thoroughly, ensure that they are completely dry before reassembling.
- Reassemble the machine: Put all the parts back together in their proper places. Refer to the user manual for any specific instructions on how to properly reassemble your particular machine.
- Fill the water reservoir with clean water: Open the water reservoir and fill it with fresh, clean water. Be sure to fill it up to the recommended level indicated by the manufacturer.
- Run a rinse cycle or brew plain water: Depending on your machine, you can either run a rinse cycle specifically designed for cleaning, or simply brew several cups of plain water. This will help flush out any remaining vinegar or soap residue from the cleaning process.
Example: For a coffee machine, you may need to press the “Rinse” or “Clean” button to initiate the rinse cycle. If you have a single-serve machine, simply insert a clean pod or capsule and select the largest cup size to brew plain water.
- Dispose of the rinsed water: Once the rinse cycle is complete or you have brewed enough plain water, discard the water from the reservoir.
Example: For a coffee machine, you can pour out the water from the carafe or detach the water reservoir and empty it into the sink.
By following these steps, you will effectively reassemble your machine and ensure that any remaining cleaning agents are flushed out, leaving your appliance ready for use.
Wrapping things up
So there you have it! By following these easy steps, you can keep your single serve pod machine clean and make sure it keeps churning out those tasty beverages. Not only will regular cleaning help your machine last longer, but it will also help maintain the quality and flavor of your favorite drinks. So go ahead and give your machine some TLC – it’s worth it! Cheers to a sparkling-clean coffee experience!
Gathering Your Gear


Making your machine sparkle!
Getting the most out of your Single Serve Pods
- Start by selecting the single serve pod flavor or type that you prefer
- Make sure your single serve coffee machine is clean and free from any residue
- Insert the single serve pod into the designated slot in your coffee machine
- Follow the instructions on your coffee machine to select the desired cup size and brewing strength
- Press the start button and wait for your coffee to brew
- Once the brewing process is complete, carefully remove the used single serve pod from the machine and dispose of it properly
- These steps should help you get started with using single serve pods with your coffee machine. Enjoy your cup of coffee!
Got questions about Single Serve Pods? We’ve got you covered!
Are Single Serve Pods more expensive than buying coffee or tea in bulk?
Well, it really depends on how you look at it, but generally speaking, single-serve pods tend to be more expensive than buying coffee or tea in bulk. Let me break it down for you.
When you buy coffee or tea in bulk, you usually get a larger quantity for a lower price per serving. This is because you’re not paying for individual packaging and the convenience of having each serving pre-measured.
On the other hand, single-serve pods come in individual packages, which adds to their cost. Additionally, the convenience factor of having pre-measured servings and the ease of preparation are factors that are reflected in the price.
So, if you’re on a tight budget and consume a lot of coffee or tea, buying in bulk would generally be more cost-effective. However, if you value the convenience, variety, and ease of use that single-serve pods offer, then the higher price might be worth it to you.
Ultimately, it’s a matter of personal preference and priorities.


I followed the guide, but my machine still seems to be clogged and not working properly. Any troubleshooting tips?
Thank you for the suggestion! Descaling the machine is indeed an important step in maintaining its performance. We will definitely consider adding it to the guide.
Is it safe to use vinegar for cleaning the internal components of the machine? I’ve heard mixed opinions about it.